1. Introduction
The CLC software that UCI has licensed includes the Java-based Genomics Workbench which can be loaded onto your personal Mac, Windows, or Linux PC and provides a Graphical User Interface (GUI) to a number of frequently used analyses. In this respect, it is similar to DNASTAR’s Lasergene software which is available from BioSci (if interested, please contact Steve Carlyle).
1.1. Setting the License Server
In order to run this software on your personal Mac/PC, you will have to download the software directly from CLCBio, install it appropriately for your platform, and then point it at the Biochemistry license server which will allow you to check out a token to run it. The workbench will ask you to identify it when it starts up, but if you miss it on the 1st startup or need to change it, you can edit the License Server configuration by clicking:
Menu item HELP → License Manager → Configure Network License → click Manually specify license server and provide the information shown below:
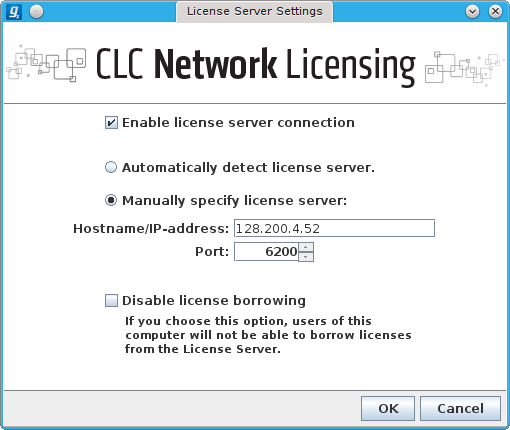
If the image above is missing, the required info is shown below in text form
[x] Enable license server connection

( ) Automatically detect license server

(o) Manually specify license server

Hostname/IP-address [128.200.4.52]
               Port [6200]

[ ] Disable license borrowing
    If you choose this option, users of this
    computer will not be able to borrow licenses
    from the License Server.
Where the CLC package differs from the available Lasergene is in its capacity is that UCI has also licensed the CLC Genomics Server Assembler, which provides an integrated multicore assembler functionality, supporting the Illumina format among others. The machine hosting it on the BDUC cluster has four 64bit Opteron cores and 64GB RAM, so it should have sufficient resources to handle most assemblies.
There are 2 ways to use the CLC software.
-
You can use it in standalone mode, on your own machine, which supports all of the functionality. If you decide to run it on your own personal computer, just download and install the Genomics Workbench, then when starting it, direct it at the Biochemistry license server: 128.200.4.52, port 6200, as described above
-
You can use it on the BDUC cluster node which means that the GUI will run a bit slower, but you will have access to the hardware resources of that machine which are larger than most personal machines (but not by much, for recent desktop machines.)
The following describes how to run it on the BDUC machine.
2. Pre-Requisites
To use the CLCbio Genomics Workbench from the BDUC server, you must first have an account on the BDUC cluster. Mail Harry Mangalam to request one if needed. Please mention that you’ll be using the CLC Assembly server, as I’ll need to make a node-local directory for you. This is where you should copy your assembly data before starting an assembly run. Note that you will have 2 different directories - your login /home/<your_UCINetID> dir, which is shared among all the BDUC nodes, and your directory on the CLC Genomics Server (aka claw6, on the BDUC cluster), which is not shared.
Also, your Mac or PC must be set up to use ssh and support X11 graphics.
The CLCBio GUI is a Java application that uses the above-mentioned X11 graphics to provide the application from the BDUC Assembly Server. To log into the Assembly Server, you must use ssh, configured to tunnel X11 graphics (on Linux and MacOSX, ssh -Y); on Windows, it must be explicitly configured as described below)
2.1. Windows
If you use Windows, you’ll need to set up both PuTTY (to provide the ssh software) and Xming (to provide the X11 software). Both of them are free and freely distributable - you can legally give them to anyone.
Xming provides the X server that displays the X11 GUI information that comes from the Linux machine. When started, Xming looks like it has done nothing, but it has started a hidden X11 window (note the Xming icon in the toolbar). When you start an X application on the Linux server (after logging in with PuTTY as described below), it will accept a connection from the Linux machine and display the X11 app as a single window that looks very much like a normal MS WinXP window. You’ll be able to move it around, minimize it, maximize it and close it by clicking on the appropriate button in the title bar. There may be a slight lag in response in that window, but over the University network, it should be be acceptable.
PuTTY is an ssh terminal connection that allows you to securely connect to the Linux server and interact with it in a purely text-based basis. For shell/terminal cognoscenti, it’s considerably less capable than any of the terminal apps (konsole, eterm, terminator, etc) that come with Linux, but it’s fine for establishing the 1st connection to the Linux server. Since the CLCBio genomics Workbench requires an X11 GUI, you’ll need to configure PuTTY to do X11 forwarding.
To enable this, double-click the PuTTY icon to bring up the PuTTY configuration window. On the left Pane, follow the clickpath:
Connection → SSH → X11 → check the "Enable X11 Forwarding" box.
After setting this, click on Session at top of the pane, and set a name in Saved Sessions on lower right pane, click the [Save] button to save the connection information so that the next time you need to connect, the correct setting will already be set.
2.2. Macintosh
If you use a Mac, you’ll need to install the X11 software that comes with the OS. The MacOSX installation DVDs come with a free, Apple-certified X11 installation. On Leopard, it’s in Optional Installs → Optional Installs.mpkg All you have to do is install it and start it running in the background to accept the X11 windows (Applications → Utilities → X11).
Then start the Terminal app and log in as shown below. Note that you have to use the -Y flag.
For a more in-depth tutorial, Apple has a longer tutorial as well.
2.3. Linux
If you use Linux, you should be good to go already. These tools and packages are already installed on all popular distributions of Linux.
3. Logging in to the CLC server
3.1. Mac & Linux
If you do not want to use the BDUC login node, you can log directly into the claw6 node by entering the following line into your terminal application (Mac & Linux):
ssh -Y <Your_UCINetID>@bduc-claw6.nacs.uci.edu
3.2. Windows
If you are using the putty application, you will have to first log into the bduc-login node and from there, log into claw 6.
-
First connect to bduc-login.nacs.uci.edu
-
Once logged into the bduc-login node, connect to the claw6 node via
ssh -Y claw6
ssh assumes you want to use the same login ID and claw6 has been aliased to the correct machine.
3.3. Using the Nomachine NX client
This free software enabled you to start and maintain a Desktop connection to claw6, even when you disconnect (for example, to close your laptop to go home or even abroad). It’s somewhat complicated to set up but it gives usable performance even across continents (most of the time). Please see the BDUC HOWTO on the NX clients.
When you start this connection, you’ll need a terminal application on the remote desktop and then continue as described below. To open a terminal session from the KDE desktop, right-click → Run Command → then type konsole (without the quotes), and then click on the konsole terminal app that appears below the search bar.
If you want to start the CLCBio app directly, jut type CLC into the Run Command search bar and the 2 CLCBio clients will appear as options. Choose the one you want.
3.4. Starting the CLC Workbench
Once you have logged into claw6, the process is identical for all clients.
The system will spew some informational lines and the identify itself as claw6 like this:
14:17:46 <UCINetID>@claw6:~
35 $

# then you type

clcbio
If you’ve done everthing right, the CLCBio splash screen will pop up and shortly thereafter you’ll see the whole application window. It has already been directed to the Biochemistry license server.
4. Genome data
The genome reference data is stored in /ppl/genomedata, which currently has human, rat, mouse, yeast, and elegans genome sequences available in compressed fasta files on a per-chromosome basis.
5. Your data
If you’re going to use the assembly server, you’re probably going to want to transfer a lot of read data to it. When I respond to your request for an account, I should have made a local account for you on the claw6 node - /ppl/<your_UCINetID>. You can cd into that account and set up additional directories to organize your data. If it does not exist, then I forgot - please email-remind me.
When you copy your data directly to bduc-claw6.nacs.uci.edu using scp, CyberDuck for the Mac, or WinSCP for Windows, please direct the data directly to the /ppl/<your_UCINetID> dir. If you don’t, both the initial transfer will be slow and the following analysis will also be much slower than otherwise.
|
|
CLCBio data ownership and permission
Please mail me if you have questions. If I’m not available, Jenny Wu has been made members of the clcbio group which means they have admin privs for installing/deleting Plug-in’s from within the Genomics Workbench application, and other things on the /ppl partition where the CLCBio stuff is stored. Most of the plugins have already been installed, but if you need more, you can install them yourselves now, as long as you can follow the above directions. |